
How to compress thousands of images in 30 seconds
Mar 27, 2024
Published by Hristijan N.
*Disclaimer: Content was partially written by ChatGPT, proofread, and edited by Hristijan Najcheski.
This is a quick guide on how you can use Photoshop to compress thousands of images in only 30 seconds.
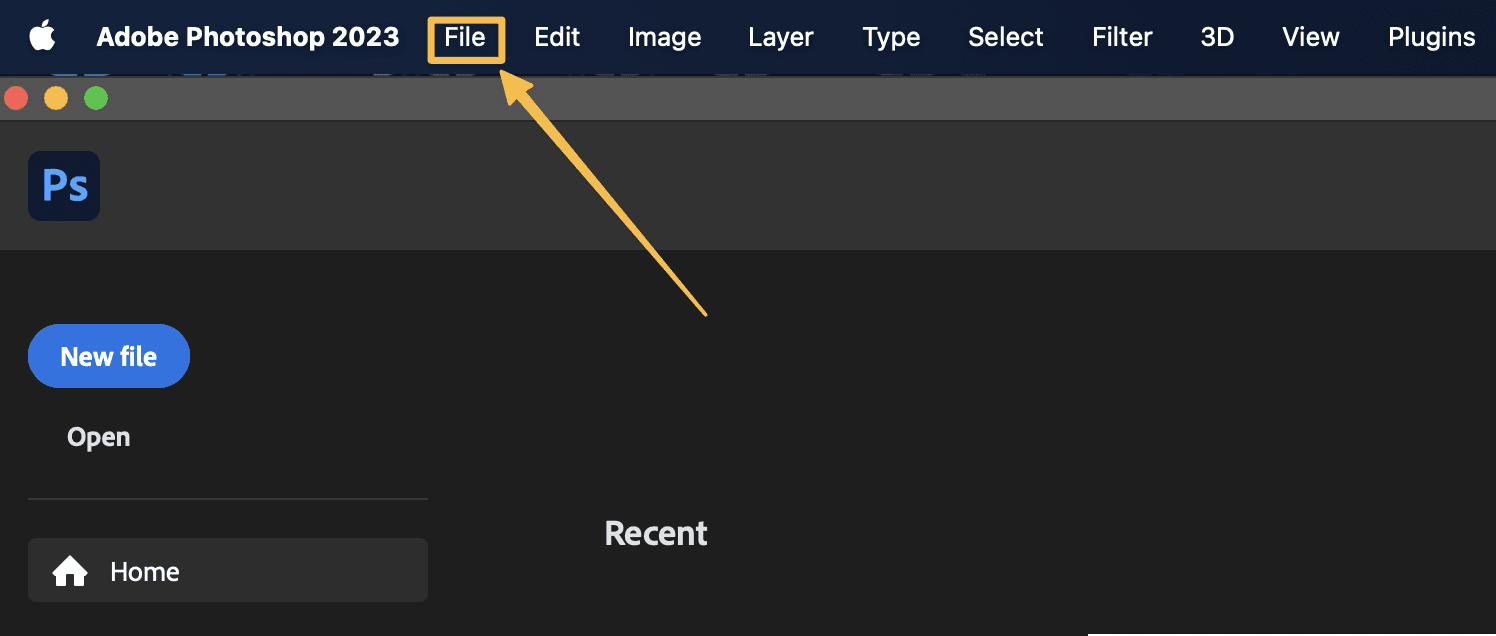
Open Photoshop: Fire up your Photoshop application and get ready to expedite your image processing.
Navigate to File: Once Photoshop is open, head to the "File" tab located in the menu bar at the top of your screen.
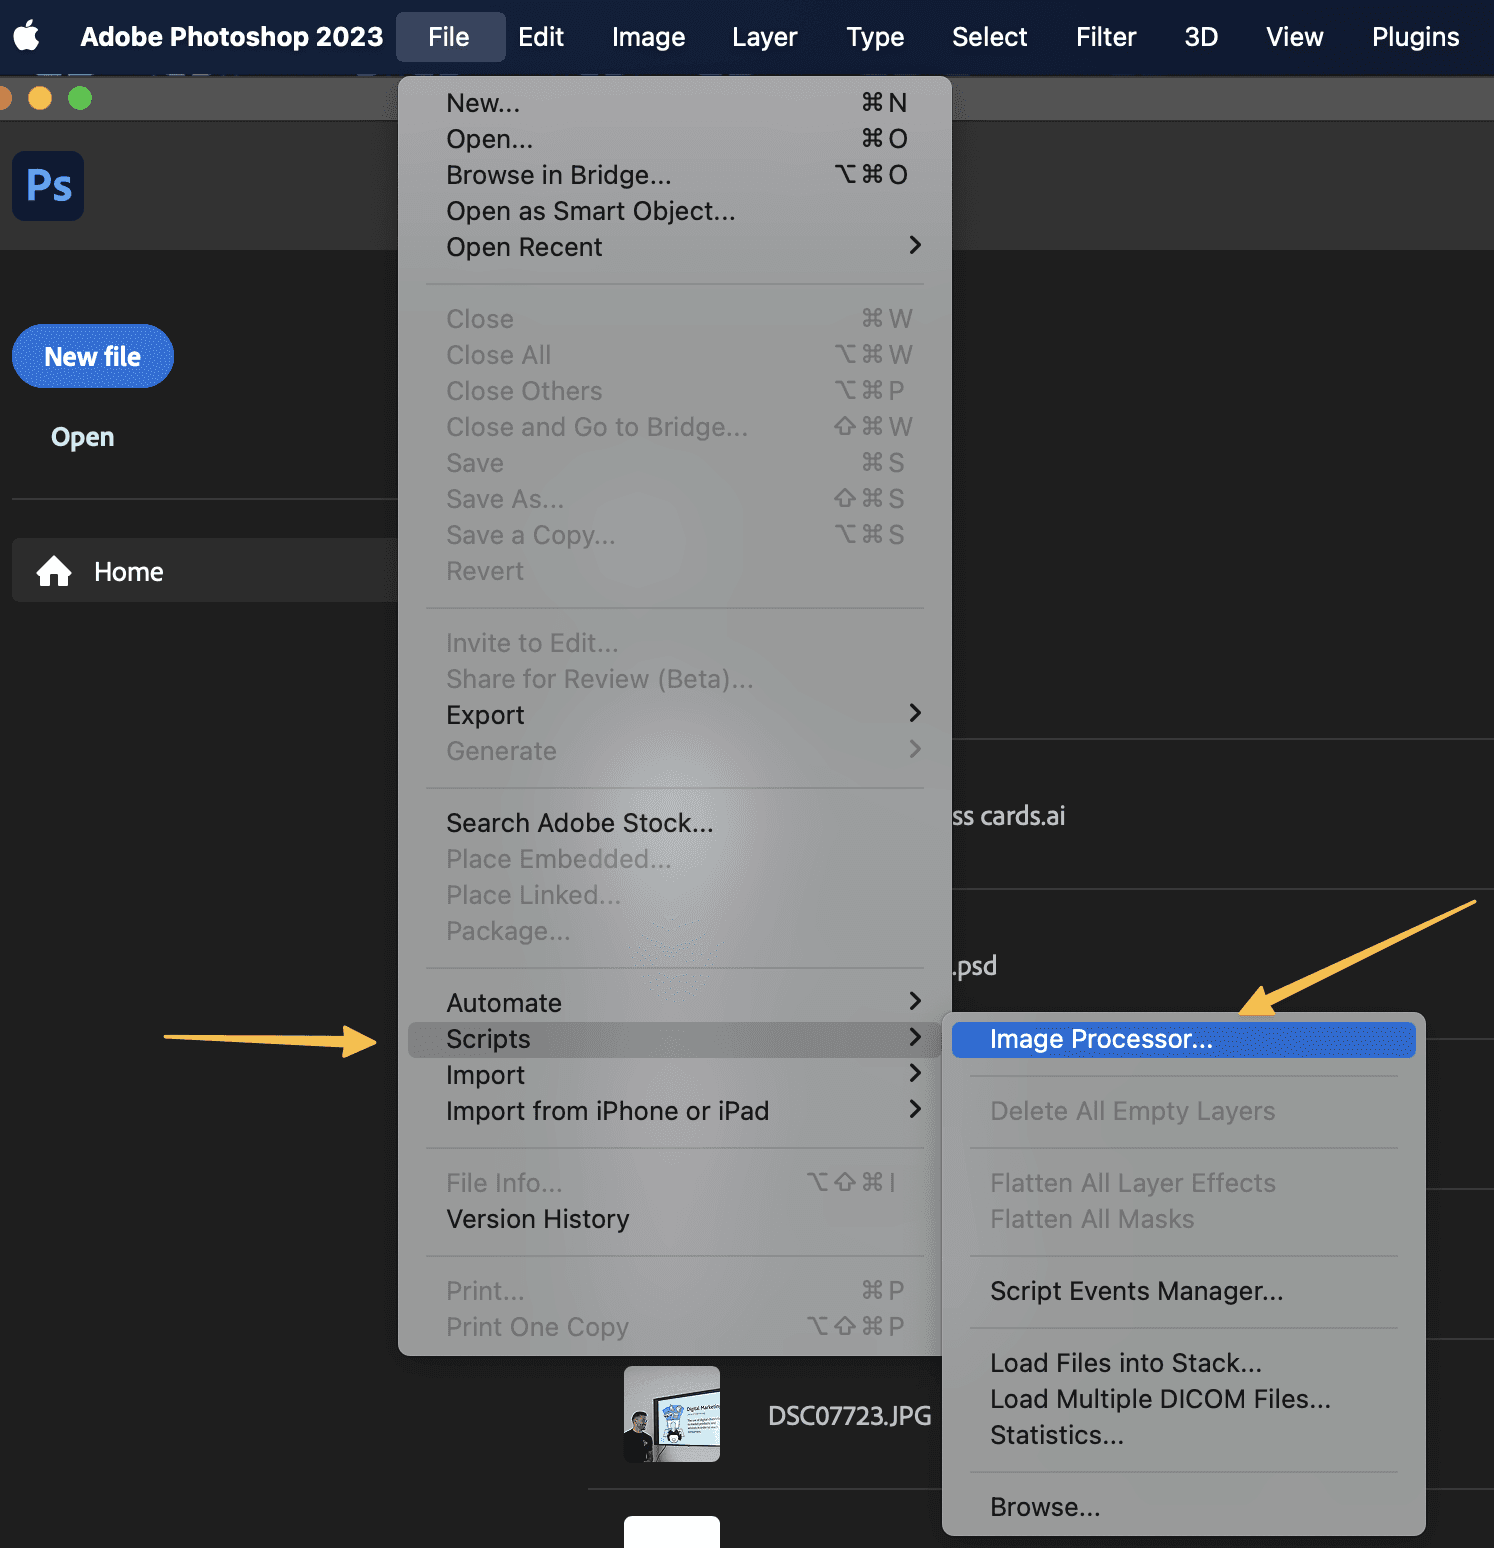
Access Image Processor: Under the "File" tab, scroll down and locate the "Scripts" option. Click on it to reveal a dropdown menu, then select "Image Processor."
Select Your Image Folder: In the Image Processor window, you'll see options to choose the folder where your images are stored. Click "Select Folder" and navigate to the directory containing your images.
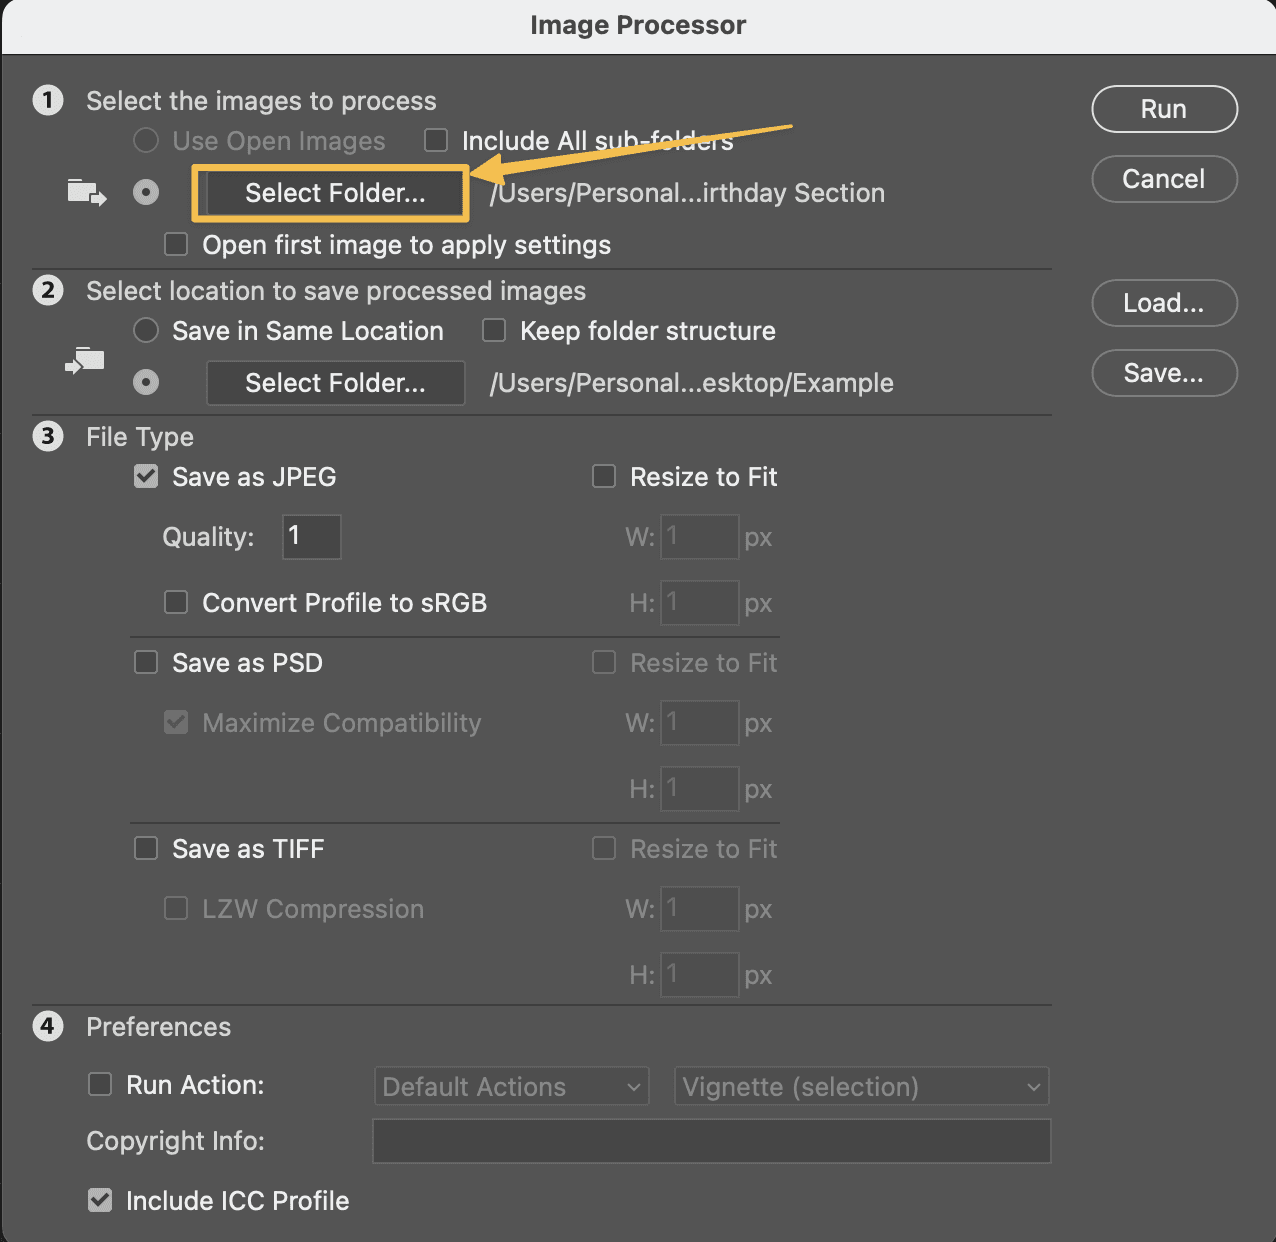
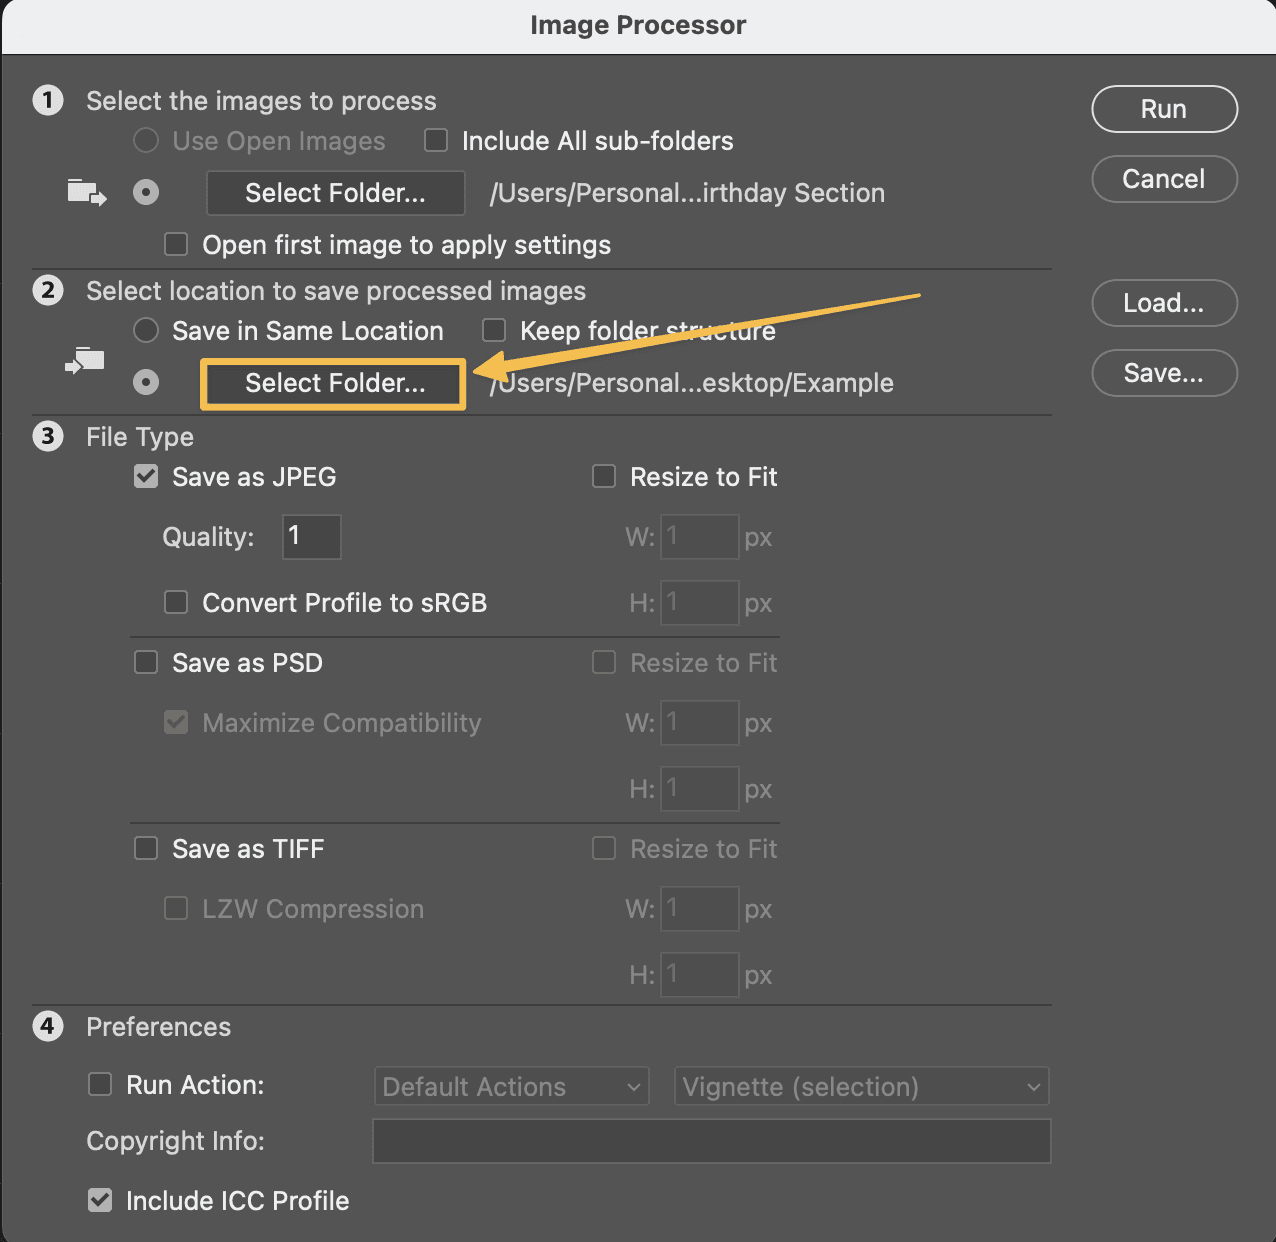
Choose Export Destination: Next, designate the folder where you want to export the processed images. This ensures your edited images are neatly organized and easily accessible.
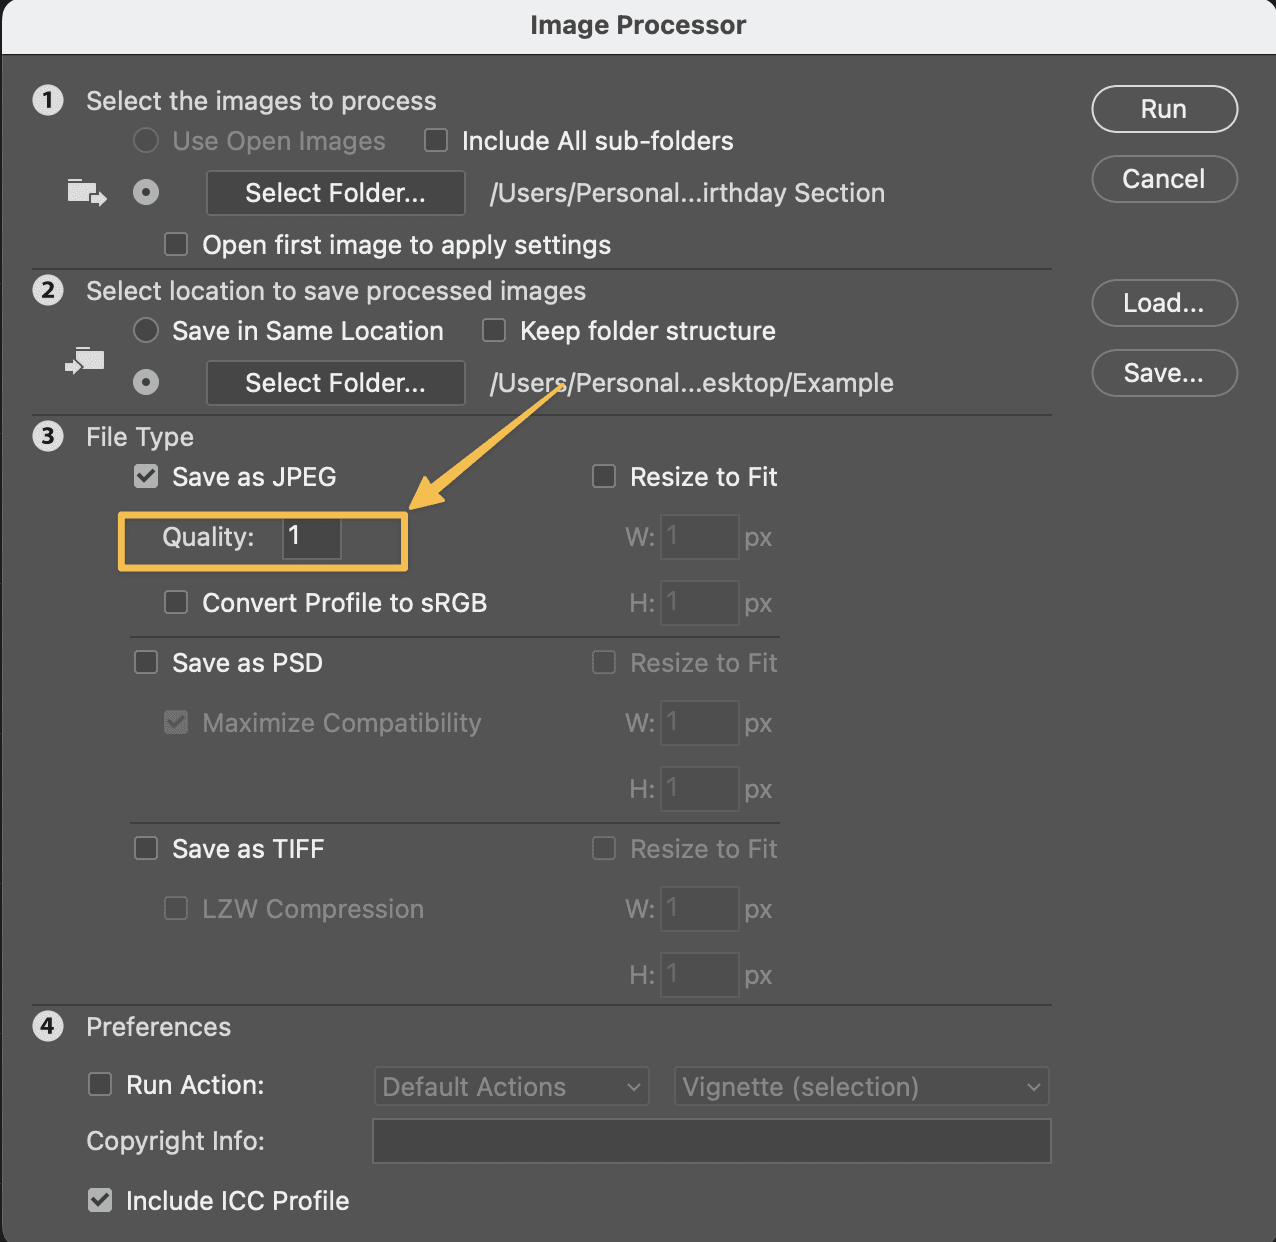
Adjust Quality Settings: Now, it's time to fine-tune the quality settings according to your preferences. You can adjust parameters such as file format, image size, and compression to achieve the desired results.
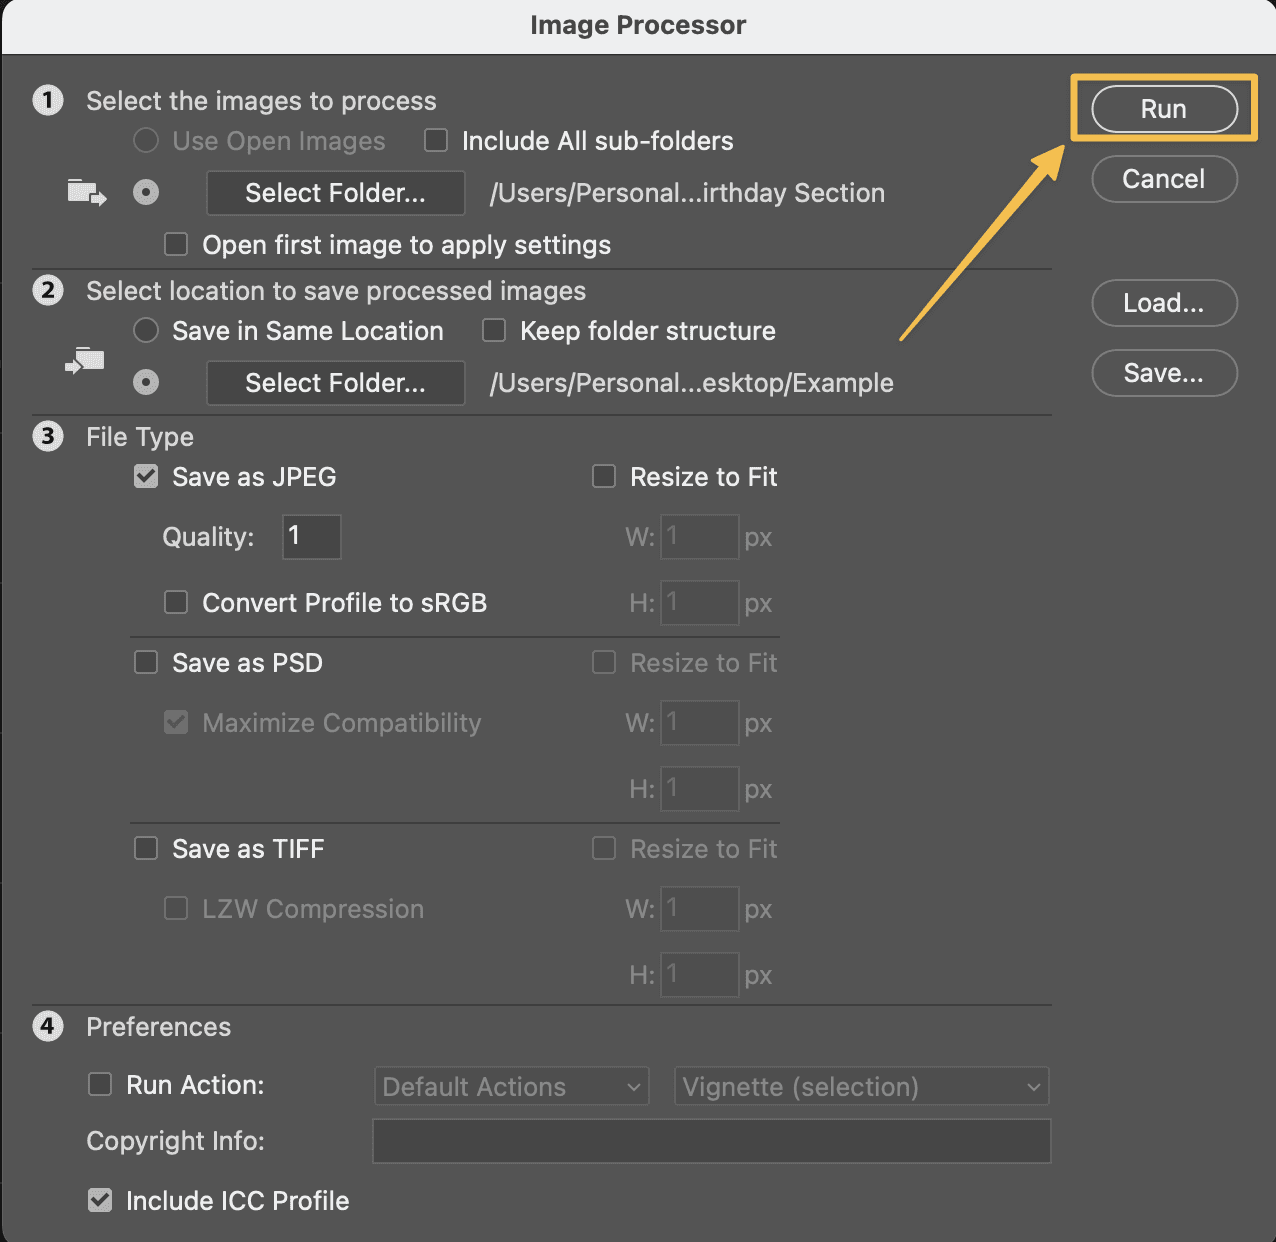
Hit "Run": Once you've configured the settings to your liking, simply hit the "Run" button to initiate the processing. Sit back and relax as Photoshop works its magic on your images.
Enjoy the Processing: Voila! With just a few clicks, you've successfully processed your images at lightning speed.
Now, you can just sit back and watch those images roll out.
You can watch the video tutorial on the following link:
